
The short answer
To hit an exact KB target, change three things in a fixed order: dimensions first, format second, compression quality last. Resize to the size the image will actually be displayed at, save photographs as JPEG, then lower quality in small steps and re-check the file size after every step. Always work on a copy so your original stays safe. An on-device tool keeps the photo private while you experiment.
Why file size is not just about pixels
Two images with the same dimensions can be very different in kilobytes. File size depends on four things working together:
| Lever | What it changes | Cost to quality |
|---|---|---|
| Dimensions (pixels) | Total information in the file | Highest saving, biggest visual change if overdone |
| Format (JPEG, PNG, WebP) | How the file is encoded | JPEG suits photographs; PNG suits sharp text and screenshots |
| Compression quality | How aggressively the encoder discards detail | Small steps cost little; big steps look blocky |
| Content complexity | A busy scene resists compression | You cannot change this, so work around it |
JPEG compression is designed for photographs and is defined as a lossy standard by the JPEG Committee. PNG is a lossless format suited to images with sharp edges, text and transparency, as set out in the W3C PNG specification. Choosing the wrong format is the most common reason people crush quality unnecessarily.
The iterative loop that actually works
No single setting produces an exact KB output for every photo, because content complexity varies. So you iterate.
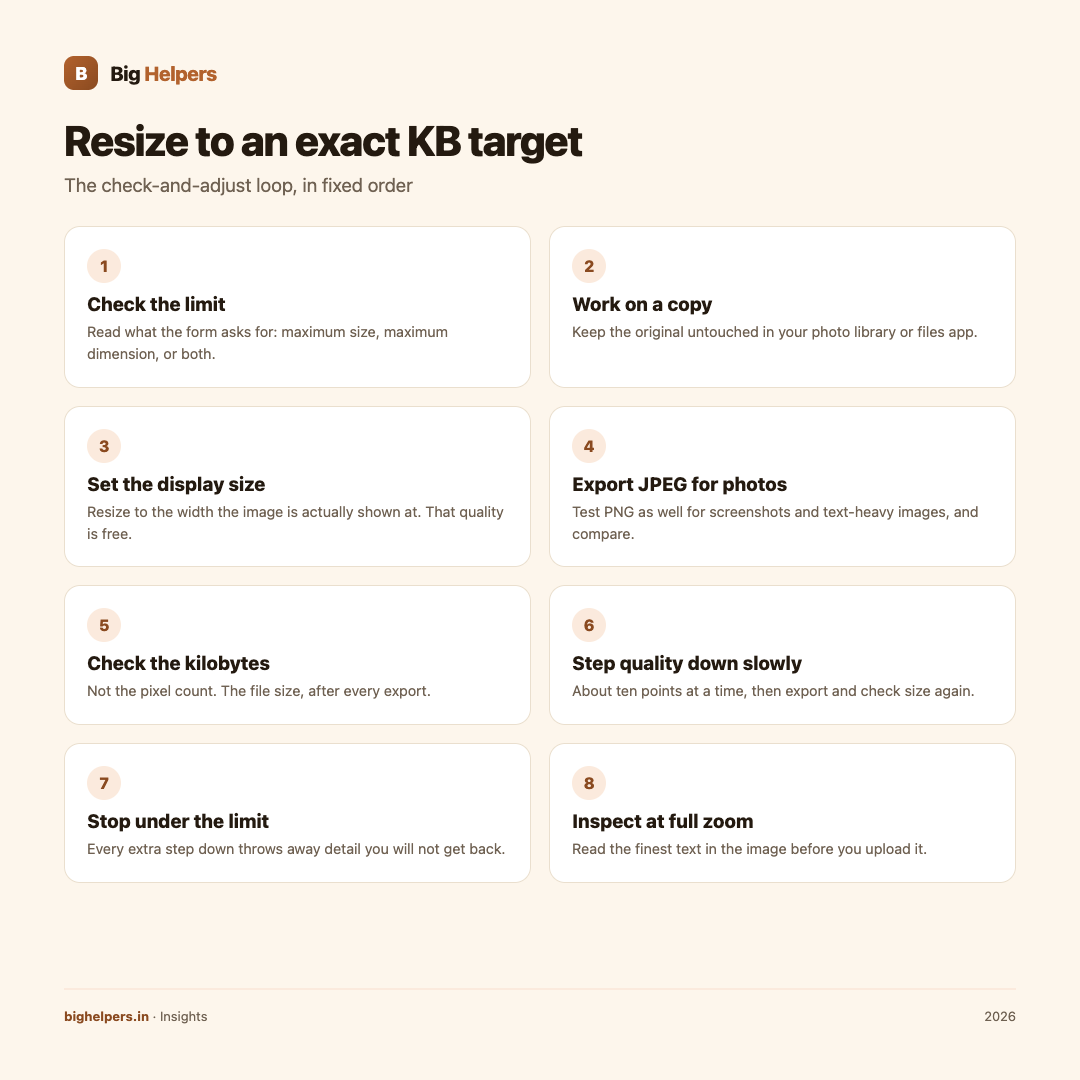
- Check the limit. Read what the form or portal asks for: a maximum size, a maximum dimension, or both.
- Work on a copy. Keep the original untouched in your photo library or files app.
- Set dimensions to the real display size. If a preview box shows the image at 600 pixels wide, resizing to 600 pixels wide is free quality you are not losing.
- Export as JPEG for photos. For screenshots or text-heavy images, test PNG as well and compare.
- Check the new file size. Not the pixel count, the kilobytes.
- Adjust quality in small steps. Move quality down by about ten points at a time, export, check size again.
- Stop as soon as you are under the limit. Every extra step down throws away detail you will not get back.
- Open the result and inspect it. Zoom to 100 percent and read the finest text in the image before you upload it.
A worked example
Suppose a passport-size photo is 3.2 MB and a form asks for under 100 KB. Export a copy at the required pixel dimensions as JPEG at quality 80. If it lands at 240 KB, drop to quality 70 and check again. If you reach quality 55 and still sit above the limit, the dimensions are probably still too large, so reduce them slightly and reset quality back up to 75. The final file should sit just under the limit with the least compression applied.
Protect quality where it matters
If the image contains a face, a signature or a document number, check those areas specifically at full zoom. Compression damage shows first in fine detail: eyes, hair edges, signatures and small print. A slightly larger file that passes inspection is better than a smaller file that fails it.
Also resist converting a photo to PNG to "keep quality". PNG will often make a photograph larger, not smaller, because it was not designed for continuous-tone images.
Keep the process private
Resizing a photo for an application form often means handling an ID document or a signed paper. Browser-based resizers and free online tools upload your file to a server you know nothing about. Prefer a tool that processes the image on your device, with no account and no upload.
Pixifold is our free iOS app for exactly this kind of private file work. Its App Store listing describes it as offering private image and PDF tools for resizing, stitching, scanning and export, and states that you can "resize one or many images using file-size targets, presets, exact dimensions, or format conversion". Processing happens on your device with no account, advertising, analytics, tracking or developer-operated cloud processing, the listing states data is not collected, and each job creates a new result and leaves the file you selected unchanged. Pixifold is available on iOS. Android is in controlled testing.
Two cautions. First, keep the original photo. Resizing is destructive on the copy, and you may need the full-resolution version later. Second, if you resize the same photo repeatedly from an already-compressed copy instead of from the original, quality loss compounds. Always start the loop again from the original.
Frequently asked questions
Why does the same KB target need different settings for different photos?
A plain wall compresses far more than a busy market scene. Content complexity changes output size at every quality setting, which is why a fixed recipe cannot work and the check-and-adjust loop does.
JPEG or PNG for forms and screenshots?
JPEG for photographs of people, documents and scenes. PNG for screenshots, text and images needing transparency. Test both on your actual file and compare size and sharpness.
Does resizing remove the location and other metadata?
Re-encoding an image in a new export often changes or drops metadata, but do not assume it. Inspect the copy before you send it. Pixifold's listing includes the ability to "inspect camera, device, date, location, and other embedded metadata", so you can check the exported file, not guess.
The portal also has a minimum size. How do I hit a range?
Export at higher quality and larger dimensions until you sit inside the range. Increase quality in small steps and stop as soon as you clear the minimum.
My file grew when I saved a photo as PNG. Why?
PNG stores photographs losslessly, which takes more space for continuous-tone images. Save photographs as JPEG and keep PNG for screenshots and flat graphics.
Is one round of resizing enough for every upload?
No. Every portal and every photo is different. Run the loop for each new form, and save a clearly named copy of the final file so you can reuse it if the same limits appear again.
Last reviewed: 29 August 2026.
What to do next
If you regularly resize photos for forms, portals and uploads, try Pixifold on your iPhone or iPad. It resizes to file-size targets, presets and exact dimensions, converts formats and stitches images, entirely on your device. Pixifold is available on iOS. Android is in controlled testing. See the Big Helpers apps page for current status, read more practical guides in our insights section, or contact us with a question about private file workflows.
Sources & references
- JPEG Committee, the JPEG standard
- W3C PNG specification
- Pixifold on the App Store
- Big Helpers apps page
Pricing in this guide is verified as of the article date. Verify with vendors before committing budget — rates change quarterly.